WELCOME TO KINGHOME
Get A Free Quote
We will get back to you within 8 hours

WELCOME TO KINGHOME
We will get back to you within 8 hours
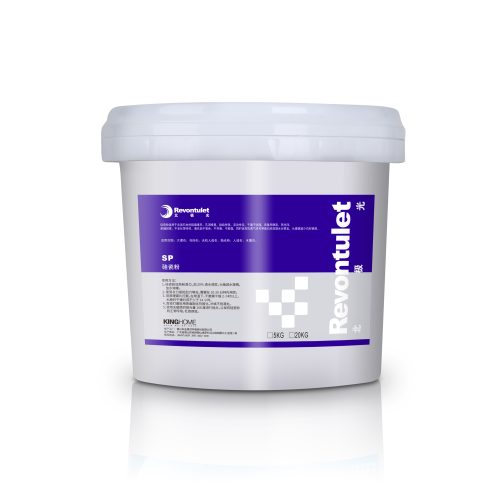
-500x500.png "Stone Jade Glue(A+B)")






KingHome adhesive solutions deliver professional-grade bonding performance for stone, tile, and flooring applications in commercial and institutional environments. These specialized formulations address critical challenges including substrate hollowing repair, stone installation, moisture resistance, and long-term structural integrity across marble, granite, ceramic, and engineered flooring systems.
Stone adhesive searches often describe different jobsite problems with similar words. A stone epoxy adhesive is usually selected for higher-strength bonding, filling, or crack repair. Stone tile glue and stone tile adhesive are searched when installers need bed adhesion, hollow tile fixing, or localized repair on marble, granite, artificial stone, ceramic tile, or sintered stone. For visible natural stone work, color stability, polishability, open time, and shrinkage control matter as much as initial bond strength.
| Search intent | Better product direction | Selection note |
|---|---|---|
| Stone epoxy adhesive or stone adhesive epoxy | Two-component epoxy or structural stone adhesive | Use for stronger bonding, crack filling, edge repair, or areas where moisture resistance and low shrinkage are important. |
| Stone tile glue or stone tile adhesive | Stone specific tile adhesive or injection repair adhesive | Match the adhesive to substrate porosity, tile size, traffic load, and whether the repair is open-bed or hollow-tile injection. |
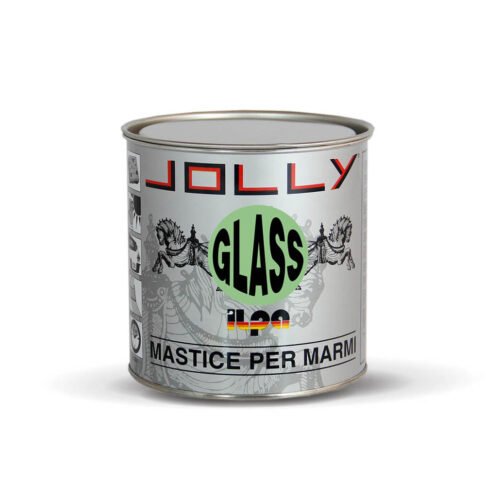
| Jolly mastic | Color-matched mastic for marble and natural stone finishing | Choose the shade, transparency, cure speed, and polishing behavior around the final stone surface. |
| Adhesive for stone tiles | Epoxy based tile adhesive, mastic, or flexible stone adhesive | Confirm exterior exposure, wet areas, joint width, movement, and cleaning chemical resistance before installation. |
For stone adhesives, the safest specification starts with the failure mode. Hollow tile fixing needs flow and penetration. Marble chip repair needs a polishable fill. Granite adhesive work may need stronger bonding and longer open time. Artificial stone and sintered stone repairs need attention to thermal movement and stain risk. A universal high-performance tile adhesive can be useful for routine bonding, but professional stone repair still benefits from matching epoxy, mastic, or flexible adhesive chemistry to the surface and repair depth.
Related product paths: compare ILPA JOLLY MASTIC for color-matched finishing, Spring Epoxy for flexible epoxy bonding, and DR Stone Hollowing Adhesive when the repair goal is hollow tile fixing.
Choose stone adhesive by matching the material, joint size, curing speed, and whether the repair needs structural bonding, crack filling, color matching, or vertical hold. Epoxy systems suit high-strength bonding, mastic works well for marble and natural stone filling, and specialty tile adhesives help with stone, ceramic, and sintered-surface installation needs.
| Repair need | Adhesive direction | Best-fit use case |
|---|---|---|
| Crack or hole filling | Mastic or color-matched stone glue | Marble, granite, artificial stone repair |
| High-strength bonding | Epoxy adhesive system | Structural stone bonding and durable joints |
| Fast jobsite repair | Rapid-setting glue or mastic | Small repairs, edge work, urgent maintenance |
| Tile or slab installation | Stone specific tile adhesive | Tile, sintered stone, limestone, wall or floor work |
Compare KingHome stone and tile adhesive products by bonding strength, color effect, working time, surface compatibility, and whether the repair is decorative, structural, or maintenance-focused.
Technical formulations feature modified epoxy, polyurethane, and acrylic chemistries engineered for high-hardness bonding, anti-aging properties, and superior moisture barriers. Products meet demanding performance requirements including shear strength retention under water immersion, thermal cycling resistance, and compatibility with alkaline substrates common in commercial construction. Working times range from 20-40 minutes with full cure profiles designed for professional installation schedules.
Primary applications span facility maintenance operations including floor tile repair, stone restoration, slab leveling, and structural hollowing correction in high-traffic commercial spaces. Products serve hospitality, healthcare, retail, and institutional sectors where long-term bonding integrity directly impacts facility operations and lifecycle costs. Selection considerations include substrate porosity, moisture conditions, load-bearing requirements, and chemical exposure profiles specific to each installation environment.
Adhesive selection requires matching chemistry type to substrate materials and performance demands. Epoxy-based formulations provide maximum structural strength for heavy-duty repairs and permanent installations, while modified acrylics offer flexibility for substrates subject to thermal movement or vibration. All formulations incorporate low-VOC ingredients aligned with commercial building standards and support LEED-compliant facility operations.
Technical support includes substrate compatibility verification, application methodology guidance, and performance specification matching to project requirements. Professional installers and facility teams benefit from products engineered for reliable field performance across diverse installation conditions while minimizing application complexity and curing variability.
GET IN TOUCH


u003cstrongu003eA: u003c/strongu003eThere are three primary types:u003cbru003eu003cbru003eu003cstrongu003eCement-based adhesivesu003c/strongu003e (e.g., polymer-modified thin-set mortars) are versatile for most indoor/outdoor applications, offering strong adhesion and moderate flexibility. They’re ideal for natural stone (marble, granite) and ceramic tiles.u003cbru003eu003cstrongu003eEpoxy adhesivesu003c/strongu003e provide superior strength, chemical resistance, and durability for heavy-traffic or harsh environments (e.g., kitchens, laboratories). They’re suitable for large-format tiles and stone but require careful mixing.u003cbru003eu003cstrongu003ePre-mixed adhesivesu003c/strongu003e are convenient for small projects but have limited shelf life and lower performance compared to cement-based options.u003cbru003eu003cbru003eAdhesives are also classified by European standards (e.g., EN 12004):u003cbru003eu003cbru003eu003cstrongu003eC1/C2u003c/strongu003e: C2 adhesives have higher tensile strength (≥1.0 N/mm²) for large or heavy tiles.u003cbru003eu003cstrongu003eS1/S2u003c/strongu003e: S2 adhesives offer superior deformability (≥5 mm) for substrates prone to movement.
u003cstrongu003eA: Substrate typeu003c/strongu003e: Ensure compatibility (e.g., concrete, plywood, or existing tiles). Smooth surfaces may require a primer.u003cbru003eu003cstrongu003eTile/stone typeu003c/strongu003e: Porous materials (e.g., travertine) need breathable adhesives to prevent moisture buildup. Heavy stones (e.g., marble) require high-strength options like epoxy or C2-rated cement-based adhesives.u003cbru003eu003cstrongu003eEnvironmental conditionsu003c/strongu003e: For wet areas (e.g., bathrooms), use waterproof or epoxy adhesives. For outdoor use, select UV-resistant and frost-proof formulations.u003cbru003eu003cstrongu003eTraffic levelu003c/strongu003e: High-traffic zones (e.g., malls) demand durable epoxy or C2 adhesives with flexural strength.
u003cstrongu003eA: Cleanlinessu003c/strongu003e: Remove dust, grease, oil, or old adhesive residue. Use a degreaser or pressure washer if necessary.u003cbru003eu003cstrongu003eRepair defectsu003c/strongu003e: Fill cracks or holes with a patching compound and ensure the substrate is flat (≤4 mm deviation per 2 meters).u003cbru003eu003cstrongu003ePrimingu003c/strongu003e: Apply a primer (e.g., ARDEX P82) on smooth surfaces (e.g., plywood or existing tiles) to enhance adhesion.u003cbru003eu003cstrongu003eMoisture controlu003c/strongu003e: For concrete, test moisture levels (≤3% relative humidity) to avoid adhesive failure.
u003cstrongu003eA: u003c/strongu003eTo achieve full adhesive coverage and prevent hollow spots—a common issue that leads to tile cracking, popping, or long-term instability in commercial stone/tile installations—follow these precise, actionable steps:u003cbru003eu003cbru003eFirst, select the u003cstrongu003ecorrect notched trowelu003c/strongu003e and use it properly. Match trowel size to your tile/stone dimensions: 6x6mm notches for small tiles (≤300x300mm), 10x10mm for large formats (≥600x600mm) or thick natural stone. Hold the trowel at a 45° angle to spread adhesive into uniform, raised ridges—this ensures consistent thickness and eliminates gaps that cause hollow spots.u003cbru003eu003cbru003eSecond, apply u003cstrongu003edouble-bonding (back-buttering)u003c/strongu003e for heavy or porous materials. For thick stone (e.g., marble slabs) or porous tiles (e.g., travertine), spread a thin, even layer of adhesive on both the substrate (floor) and the back of the tile. This fills tiny pores and air pockets, guaranteeing tight contact between the tile and floor.u003cbru003eu003cbru003eThird, u003cstrongu003epress and tap tiles firmlyu003c/strongu003e during installation. After placing the tile, use a rubber mallet to tap its surface evenly—this forces adhesive into every crevice and ensures at least 95% coverage. Avoid sliding the tile excessively, as this can scrape away adhesive and create hidden voids.u003cbru003eu003cbru003eFourth, u003cstrongu003ework in small sections (≤1 square meter at a time)u003c/strongu003e. Cement-based adhesives have a short “open time” (20–30 minutes before drying), so small sections prevent adhesive from curing before tiles are set.u003cbru003eu003cbru003eFinally, u003cstrongu003echeck for hollow spots immediatelyu003c/strongu003e. After setting each tile, tap it gently with a small tool (e.g., a screwdriver handle). A solid, dull sound means good coverage; a hollow, ringing sound indicates a hollow spot. Lift the tile within the open time, reapply adhesive, and reset it to fix the issue.u003cbru003eu003cbru003eProper substrate prep (ensuring the floor is flat, clean, and primed) also lays the foundation for good coverage—uneven or dusty surfaces will undermine even the best adhesive application.
u003cstrongu003eA: u003c/strongu003eThe method depends on whether the adhesive is u003cstrongu003efresh (uncured)u003c/strongu003e or u003cstrongu003ecured (dried)u003c/strongu003e, as improper removal can scratch or stain stone/tile—especially porous natural stone like marble or travertine.u003cbru003eu003cbru003eFor u003cstrongu003efresh, uncured adhesiveu003c/strongu003e (best removed within 1–2 hours): Use a damp microfiber cloth or sponge to wipe it away gently. For thicker globs, use a plastic putty knife (never metal, which scratches) to lift excess first, then wipe the residue with water. Avoid harsh cleaners here—water alone works for most cement-based or pre-mixed adhesives, and prevents chemical damage to stone.u003cbru003eu003cbru003eFor u003cstrongu003ecured, dried adhesiveu003c/strongu003e: Start with a plastic scraper to gently scrape off loose chunks. For stubborn residue:u003cbru003eu003cbru003eOn u003cstrongu003eceramic/porcelain tilesu003c/strongu003e: Use a stone-safe solvent (e.g., acetone or isopropyl alcohol) on a cloth—rub in circular motions until residue lifts.u003cbru003eu003cbru003eOn u003cstrongu003enatural stoneu003c/strongu003e: Test solvents on an inconspicuous spot first (to avoid discoloration). Use milder options like citrus-based cleaners for porous stones (e.g., limestone), as strong solvents can seep into pores and cause staining.u003cbru003eu003cbru003eAlways rinse the surface with clean water after using solvents, and dry with a soft cloth. For epoxy adhesives (extra durable), use an epoxy-specific remover (follow manufacturer instructions) and avoid excessive pressure to prevent surface damage.
 English
  Spanish