WELCOME TO KINGHOME
Get A Free Quote
We will get back to you within 8 hours

WELCOME TO KINGHOME
We will get back to you within 8 hours
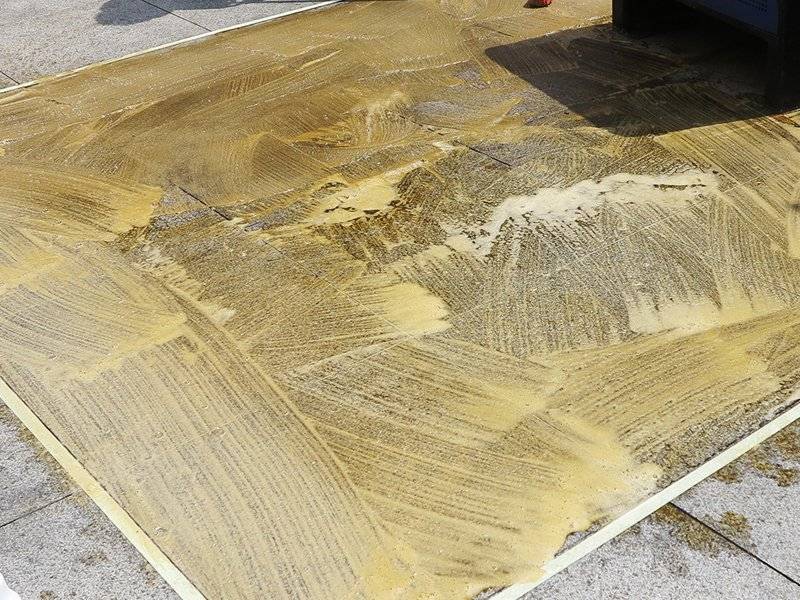
Commercial tile grout deep cleaning starts with identifying the grout and checking whether the joints are sound—not with choosing a stronger chemical or increasing brush pressure. Test a compatible cleaner and brush on a representative area, recover the loosened soil, rinse as directed, and inspect the dry result before extending the process. The Tile Council of North America recommends vacuum recovery of both dirty cleaning solution and rinse water to remove soil and remaining detergent film from grout.
A useful trial must establish three things: whether the discoloration responds to cleaning, whether the brush reaches the recessed joints, and whether the recovery method removes dirty water without damaging the floor. Cleaning cannot repair cracked, missing or deteriorating grout.
Check installation records, grout packaging or maintenance documentation before selecting chemicals. Cement-based grout, epoxy grout and other resin-based grouts should not be treated as interchangeable. Record any grout colorant, penetrating sealer or topical finish as well.
For newly installed or repaired joints, obtain the exact grout product instructions and installation date. Confirm when the product permits the proposed cleaning chemicals and mechanical cleaning; readiness for foot traffic is not automatically permission for deep cleaning. LATICRETE distinguishes traffic protection, initial cleaning and full chemical resistance in its guidance for industrial epoxy grout. Those conditions are product- and site-dependent, not a universal curing schedule.
Use the floor inspection to separate removable soil from conditions requiring a different response:
| Observed condition | What to check | Initial decision |
|---|---|---|
| Dark traffic lanes or greasy joints | Soil source, previous detergent use and condition after a small cleaning trial | Test a compatible cleaner, controlled agitation and recovery |
| Sticky film or rapid resoiling | Dosing records, rinse practice and dirty-water pickup | Investigate detergent residue before increasing chemical strength |
| White deposits or recurring pale residue | Installation history, moisture exposure and the nature of the deposit | Identify the residue before selecting a specialist treatment |
| Hard film remaining after installation | Grout type and whether the residue is cementitious or resin-based haze | Follow the relevant grout-haze removal instructions |
| Cracked, missing, loose or visibly eroded grout | Extent of deterioration and any associated tile movement | Separate repair assessment from the cleaning work |
TCNA notes that white grout residue can have different causes, including efflorescence, polymer residue and soap-related deposits. Appearance alone does not establish which treatment is appropriate.
Photograph damaged areas before wet cleaning. Mark joints that must be excluded from machine agitation, and do not use a cleaning trial to determine how much further deteriorated grout can withstand.
Select chemistry for the soil and every surface it may contact: tile, grout, grout colorant, sealer, existing finish, adjacent stone and metal trim.
For greasy soil on sound cement-based grout, an approved alkaline tile-and-grout cleaner may be appropriate. Acid is not the default solution for dark joints: TCNA explains that acids can dissolve the cement component of cementitious grout. A cleaner tolerated by the tile may still damage the joints.
Check coating limitations before use. For example, the manufacturer’s Aqua Mix Heavy-Duty Tile & Grout Cleaner technical data sheet warns that the product may adversely affect grout colorants or stains and that regular use of high-alkaline cleaners reduces sealer life. These are limitations of that specific product, not evidence that all alkaline cleaners behave identically.
Do not assume that epoxy grout tolerates every degreaser, bleach, solvent or abrasive accessory. LATICRETE’s maintenance instructions for tile with epoxy grout distinguish routine cleaning from restorative treatments and warn that aggressive cleaners may damage some tile, epoxy grout or applied sealers. Use the instructions applicable to the installed grout and selected cleaner.
Identify natural-stone borders, thresholds and inserts before treating a ceramic or porcelain floor. Marble and limestone require particular care around acids; polished finishes and existing coatings also need their own compatibility checks. Do not extend a successful tile-only trial across a different material or finish without a separate assessment. KINGHOME’s commercial tile cleaning machine selection guide provides related checks for mixed-material routes and recovery needs.
Use the cleaner’s technical instructions and label to establish its application method. Use the SDS for hazard assessment, handling, protective equipment and other safety requirements—not as proof of cleaning performance.
Choose a discreet location that represents the actual cleaning problem, not simply the least visible clean corner. Where conditions differ, establish separate trials for greasy traffic lanes, textured tile, recessed joints and coated grout.
Keep an untreated comparison area and record the following:
| Test record | Information to capture |
|---|---|
| Floor assembly | Tile type and finish, grout product if known, joint width and recess, sealer or colorant |
| Initial condition | Soil pattern, existing cracks, missing grout and previous treatments |
| Cleaner | Exact product, applicable label or technical document, and selected dilution |
| Dilution basis | Parts of product to parts of water, or final solution concentration, exactly as specified |
| Agitation | Machine model, brush or pad identification, approved settings and number of passes |
| Contact conditions | Actual dwell time and whether the solution remained wet |
| Recovery | Equipment, pickup passes and visible water left in joints or low spots |
| Rinsing | Method, rinse passes and recovery of rinse water |
| Dry result | Remaining soil, residue, color change, surface marking and joint condition |
Do not record a ratio such as “1:10” without stating what it means. Copy the product-and-water basis from the applicable instructions rather than transferring a dilution from another cleaner.
Before applying chemicals, establish access control, ventilation, splash protection and protective equipment required by the selected product and site assessment. A successful appearance trial does not replace those controls.
A machine can clean the tile faces while leaving lower joints dirty. Brush selection therefore needs to address actual contact, not just machine width or motor power.
Check:
Tennant identifies cylindrical brushes as an option for grout lines and other recesses where dirt collects. That does not establish that every cylindrical brush reaches every joint or is suitable for every finish. Confirm performance with the exact accessory on the installed floor.
If grout remains dirty while the tile faces improve, inspect brush contact and recovery before increasing down-pressure. A compatible hand-detail brush may be needed where the machine cannot reach. Do not compensate for inaccessible or deeply eroded joints by repeatedly scrubbing the surrounding tile.
Use the machine and accessory manufacturers’ permitted settings. There is no universal brush pressure, rotational speed or abrasive grade for commercial tile grout deep cleaning.
Remove loose grit and debris using a method suitable for the floor. Inspect the brush, recovery inlet, squeegee blades, hoses and tanks according to the machine instructions.
Confirm that the selected cleaner is permitted in the machine and dosing system. Chemical suitability for tile does not establish suitability for the scrubber. For example, Kärcher’s B 50 W instructions restrict detergent selection and prohibit heavily foaming detergents; check the corresponding manual for the machine actually being used.
Measure the selected dilution and apply it by the product’s approved method. Control the treated area so the team can complete agitation, recovery and rinsing within the permitted application conditions.
Follow the specified contact time rather than adopting a generic dwell period. Where the instructions prohibit drying, keep the solution from drying on the surface. Aqua Mix’s technical instructions, for example, explicitly require this and specify thorough rinsing after dirty-solution removal.
Agitate using the compatible brush and approved machine settings. Observe both the tile and joints rather than judging progress only from the color of the wastewater.
Recover the loosened soil, complete the required rinse, recover the rinse water and allow the trial area to dry before deciding whether further treatment is justified.
If the first dry result shows partial soil removal without damage, a second controlled cycle may be evaluated where the product instructions permit repeat treatment. Keep the cleaner, brush and settings unchanged initially so the effect of repetition can be assessed.
LATICRETE’s restorative cleaning instructions for KlenzAll include removal, thorough rinsing, complete drying and repeat cleaning where needed. This supports a product-specific repeat process—not indefinite scrubbing or automatic increases in concentration.
Use the scrubber’s recovery system or a wet-extraction unit suitable for the liquid being collected. Inspect recessed joints, tile edges, low spots and areas around fixtures for remaining dirty water.
Apply clean rinse water as directed by the cleaner, then recover it rather than spreading it into the next section. TCNA’s grout-cleaning guidance specifically recommends extracting the cleaning solution followed by extracting rinse water to remove remaining soap film.
If pickup is poor, correct the recovery problem before expanding the work. Do not allow a larger cleaning area to become a larger pool of contaminated solution.
The key stop condition is evidence that treatment is changing the floor rather than simply removing soil.
Suspend agitation and chemical application in the affected area if you observe:
Remove the applied cleaner by its specified recovery and rinse method, then assess the cause before continuing. Do not interpret grout-colored particles in the recovery water as proof of successful cleaning.
If sound joints remain discolored after an approved process, reassess the diagnosis. The remaining condition may require specialist stain treatment, haze removal, coating work or repair rather than stronger general cleaning.
Compare the untreated area, single-cycle trial and any repeat-cycle trial only after they have dried under comparable conditions.
Use consistent lighting, viewing angle and camera position. Compare dry before photographs with dry after photographs; a wet joint can appear darker and a reflective wet tile can make the result misleading.
Approve the process only when the trial shows an acceptable cleaning result without new damage, objectionable residue or unresolved recovery problems. Record the approved combination of cleaner, dilution, brush, settings, contact time, passes, rinsing and pickup method. Repeat the trial where the floor assembly or soil conditions change.
Keep the area controlled during cleaning and drying. Water pickup or a brighter appearance does not demonstrate slip resistance, and ordinary deep cleaning does not establish disinfection.
Cleaning removes removable soil and residues. It does not replace missing grout, close cracks or correct the cause of joint deterioration.
Document repair areas separately from the cleaning specification. After repair, follow the new grout manufacturer’s curing and chemical-exposure instructions before resuming the approved maintenance process. Do not carry over a fixed waiting period from another grout product.
For equipment planning, use KINGHOME’s commercial tile cleaning machine selection guide to compare access, brush configuration and recovery requirements. When requesting a recommendation, provide the tile and grout information, existing coatings, machine model, soil description and dry test-area results. These details give a more useful basis for discussing a cleaner, brush and recovery setup than floor area alone.
 English
  Spanish