WELCOME TO KINGHOME
Get A Free Quote
We will get back to you within 8 hours

WELCOME TO KINGHOME
We will get back to you within 8 hours
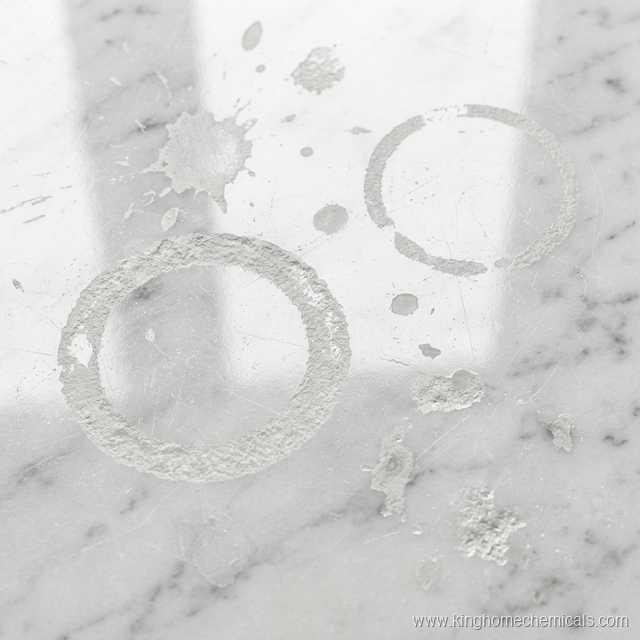
Natural stone floors represent one of the largest capital investments in any commercial or residential property. A single square meter of polished marble or granite can cost $50–$150 installed. Yet every day, well-intentioned cleaning crews permanently damage these premium surfaces by making avoidable mistakes.
The most expensive stone floor cleaning mistakes are using acidic cleaners on marble or limestone, choosing aggressive brushes, leaving dirty rinse water on the surface, skipping sealer checks, and using the wrong machine pressure. A safe stone program starts with pH-neutral chemistry, soft pads or brushes, controlled water recovery, and periodic gloss and sealer inspections.
| Mistake | Damage risk | Safer choice |
|---|---|---|
| Vinegar, lemon, or acidic cleaner | Etching and dull marks on calcium-based stone | pH-neutral stone cleaner |
| Stiff brush or abrasive pad | Micro-scratches and gloss loss | Soft nylon brush or stone-safe pad |
| Too much water left behind | Staining, haze, and residue | Scrub and recover with controlled solution flow |
| No sealer or gloss check | Faster wear and higher restoration cost | Scheduled sealer inspection and polish/crystallization plan |
For equipment selection, compare stone floor cleaning machines. For chemical selection, review the industrial stone floor cleaning guide.
The five mistakes below account for over 80% of preventable stone floor damage we see in hotel lobbies, commercial buildings, and private residences. Each one is easy to fix once you understand the chemistry and physics behind stone care.
Stone floor cleaning mistakes are easier to correct when the visible damage signal is separated from the cause. A dull lane, sticky film, etch mark, scratch pattern, or recurring stain can look like a cleaning failure, but each one points to a different recovery step.
| Visible signal | Likely mistake | First recovery check | Risk to avoid |
|---|---|---|---|
| Sticky residue or footprints after drying | Cleaner was over-dosed, not rinsed, or allowed to dry on the floor. | Review dilution, dwell time, rinse recovery, and dirty-water removal. | Adding more cleaner before removing the residue source. |
| White dull spots on marble or limestone | Acidic cleaner, bathroom descaler, or spill may have etched the stone. | Confirm whether the mark is chemical damage rather than soil. | Scrubbing harder with incompatible chemistry. |
| Swirl marks or micro-scratches | Brush, pad, grit, or trapped abrasive soil may be too aggressive. | Check pad or brush material, dust removal, machine pressure, and test-area response. | Using one brush setup for polished stone, textured tile, and coated floors. |
| Dark areas return after cleaning | Moisture, oil, open pores, or weak protection may still be active. | Document drying behavior, stain source, sealer condition, and traffic exposure. | Sealing or polishing before the contamination path is understood. |
For a practical review, provide the stone type, cleaner used, dilution, machine and brush setup, drying time, traffic condition, and photos under consistent lighting. Related references include industrial stone floor cleaning, stone floor cleaning machines, and stone efflorescence diagnosis.
Many stone floor cleaning mistakes start before the first pass of the machine. GSC queries for stone floor cleaning machine, natural stone floor cleaning machines, stone floor cleaning system, marble floor cleaning machine, and granite floor cleaning machine show that searchers are comparing equipment while trying to avoid damage. The safer approach is to specify the cleaner, brush or pad, solution flow, recovery method, and sealer condition as one system instead of treating the machine as a standalone purchase.
| Stone floor question | Wrong choice that creates damage | Safer system check |
|---|---|---|
| Stone floor cleaning machine | Using high pad pressure or an aggressive brush because the floor looks dirty | Match RPM, brush stiffness, and pad pressure to the stone type, finish, and soil load before cleaning the full area. |
| Natural stone floor cleaning machines | Treating marble, granite, terrazzo, and travertine as if they react the same way | Use pH-neutral chemistry first, then test water recovery and brush contact in a low-visibility area. |
| Marble floor cleaning machine | Combining alkaline residue, acidic spot cleaners, or hard pads on calcium-based stone | Control cleaner dilution, keep rinse water moving, and reserve crystallization or polishing for trained stone-care work. |
| Granite floor cleaning machine | Assuming granite cannot stain, haze, or lose gloss under poor recovery | Check sealer response, remove slurry quickly, and use stone-safe pads that clean without dulling the polish. |
A practical stone floor cleaning system should answer five questions before work begins: what stone is installed, whether the surface is sealed, which cleaner is safe for that finish, how much agitation is needed, and how quickly the machine can recover dirty solution. If any one of those checks is skipped, the job can leave etching, haze, brush marks, or residue even when the operator is using a commercial-grade machine.
Related planning paths: compare stone floor cleaning machine options, review industrial stone floor cleaning procedures, and use professional marble floor maintenance when crystallization, polishing powder, or restoration is part of the scope.
The Problem: Marble, limestone, and travertine are primarily composed of calcium carbonate (CaCO₃). When acidic cleaning solutions (vinegar, lemon-based cleaners, most bathroom cleaners with pH below 5) contact calcium carbonate, a chemical reaction occurs that literally dissolves the stone surface. This creates visible dull spots called etching — permanent marks that cannot be wiped away.
Even mildly acidic products (pH 5–6) cause cumulative damage over months of repeated use. On the alkaline side, strong degreasers (pH above 10) strip protective sealers and can discolor certain stone types.
The Fix:
Key Takeaway: If you remember one rule from this article, make it this: never use vinegar, lemon juice, or any product with pH below 6 on marble, limestone, or travertine. This single mistake causes more permanent stone damage than all other factors combined.
The Problem: Many facility managers use the same floor scrubber brushes across all their surfaces — including aggressive polypropylene or grit-enhanced brushes on polished stone. This creates thousands of micro-scratches per cleaning cycle that progressively dull the surface from a mirror-like 85+ gloss reading to a flat, cloudy 40–50 over a few months.
The damage is often invisible on each individual cleaning pass, which makes it deceptive. By the time the dullness becomes obvious, the surface needs professional restoration costing $5–$15 per square foot.
The Fix:
The Problem: When you mop a stone floor without first removing loose dust and grit, you turn your mop into a sanding tool. Each particle of sand or grit trapped under the mop acts as an abrasive, creating thousands of fine scratches across the stone surface during the mopping motion.
This is especially damaging on high-traffic entrances where outdoor grit is constantly tracked in. Hotels, shopping malls, and office building lobbies are particularly vulnerable because the volume of foot traffic delivers a continuous supply of abrasive particles.
The Fix:
The Problem: When cleaning solution evaporates on stone surfaces, it leaves behind mineral residues and chemical deposits that build up over time. These deposits create a progressive haze or film that dulls the stone’s appearance. On dark stones like black granite, the residue is especially visible as a whitish film.
Worse, if the cleaning solution contains any surfactants (soaps), the residue creates a sticky layer that attracts and traps dirt particles, making subsequent cleaning sessions less effective and accelerating the need for professional restoration.
The Fix:
The Problem: Stone sealers are not permanent. Penetrating sealers typically last 3–5 years, while topical sealers may need reapplication annually in high-traffic areas. When sealer protection diminishes, the stone becomes vulnerable to stain penetration, moisture damage, and accelerated wear.
Many facility managers install beautiful stone floors and then assume the initial sealer application lasts indefinitely. By the time stains appear — coffee, wine, oil, rust — the sealer has long since degraded and the stains have penetrated deep into the stone’s porous structure.
The Fix:
Use this quick checklist to verify your current stone care program is protecting your investment:
Chemical Safety:
Equipment:
Process:
Maintenance:
The most damaging mistake is using acidic cleaners on calcium-based stones like marble, limestone, and travertine. Acidic solutions (vinegar, lemon-based cleaners, bathroom cleaners with pH below 6) chemically dissolve the stone surface, creating permanent dull spots called etching. Always use pH-neutral cleaners (pH 7–8) specifically formulated for natural stone.
Yes. Vinegar is acidic (pH 2–3) and reacts with the calcium carbonate in marble, causing a chemical dissolution of the surface layer. This creates permanent etch marks — dull, light-colored spots that cannot be removed by cleaning. Even diluted vinegar causes cumulative damage over time. Never use vinegar on marble, limestone, or travertine.
Perform a simple water test every 6 months: pour a small amount of water on the stone surface. If water beads up and stays on the surface, the sealer is intact. If water absorbs into the stone within 5 minutes, the sealer has degraded and needs reapplication. Do not wait for stains to appear before testing — by that point, damage may have already occurred.
No. Different floor surfaces require different brush materials and stiffness levels. Polished stone (marble, granite) requires soft nylon brushes. Concrete and grouted tile can use stiffer polypropylene brushes. Using an aggressive brush on polished stone creates micro-scratches that progressively dull the finish. Maintain separate labeled brush inventories for facilities with multiple floor types.
Wet mopping without first removing loose dust and grit causes extensive micro-scratching. Sand and grit particles trapped under the mop act as abrasives, scratching the stone surface with each mopping stroke. Always dry-sweep or vacuum stone floors thoroughly before any wet cleaning to remove abrasive particles.
Natural stone floors deliver decades of beauty and value — but only when maintained correctly. The five mistakes above are responsible for the vast majority of preventable damage in commercial and residential settings. By implementing the fixes outlined in this guide, you can extend the life of your stone surfaces, reduce costly professional restoration needs, and maintain the premium appearance that attracted you to natural stone in the first place.
For specialized stone cleaning equipment, browse our stone floor cleaning machines guide. For commercial chemical solutions designed specifically for natural stone surfaces, explore our complete stone care product range.
Need expert advice on a specific stone care challenge? Contact our team →
 English
  Spanish